
SDT Calibration file update info is HERE!
WARNING!!! It is imperative that you read through this document carefully and follow instructions exactly to how they are provided. Failure to do so will most inevitably result in damage to this product and/or to your vehicle!
• Disconnect your vehicle’s battery before proceeding with the installation.
• Do NOT mount this device in direct sunlight within the vehicle. Do NOT mount this device within the engine bay! It should be placed within the cabin of the vehicle where it will not be exposed to water/moisture. The glove compartment is an ideal location for this unit and it will allow for easy visual check of the system display for quick reference of it’s operation.
• CAUTION!!! Improper installation and/or improper tuning CAN damage your engine.
• AshSPEC LLC will NOT be responsible for any damage caused by improper installation, improper tuning, or malfunction of the product.
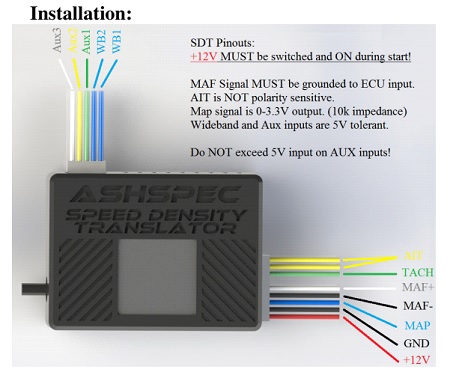

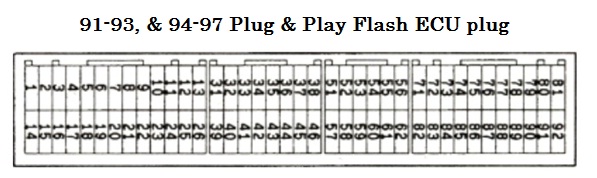
The SDT is designed with the most compact plug and play harness we could design.
The kit comes with:
-SDT (Speed Density Translator)
-Plug and Play SDT Main Harness (PNP SDT Harness)
-Sub Harness (for future use)
-Air Intake Temp Sensor M14x1.5 (GM PN 12614717, AX314)
-Red T-Tap and connector (for Tach Signal)
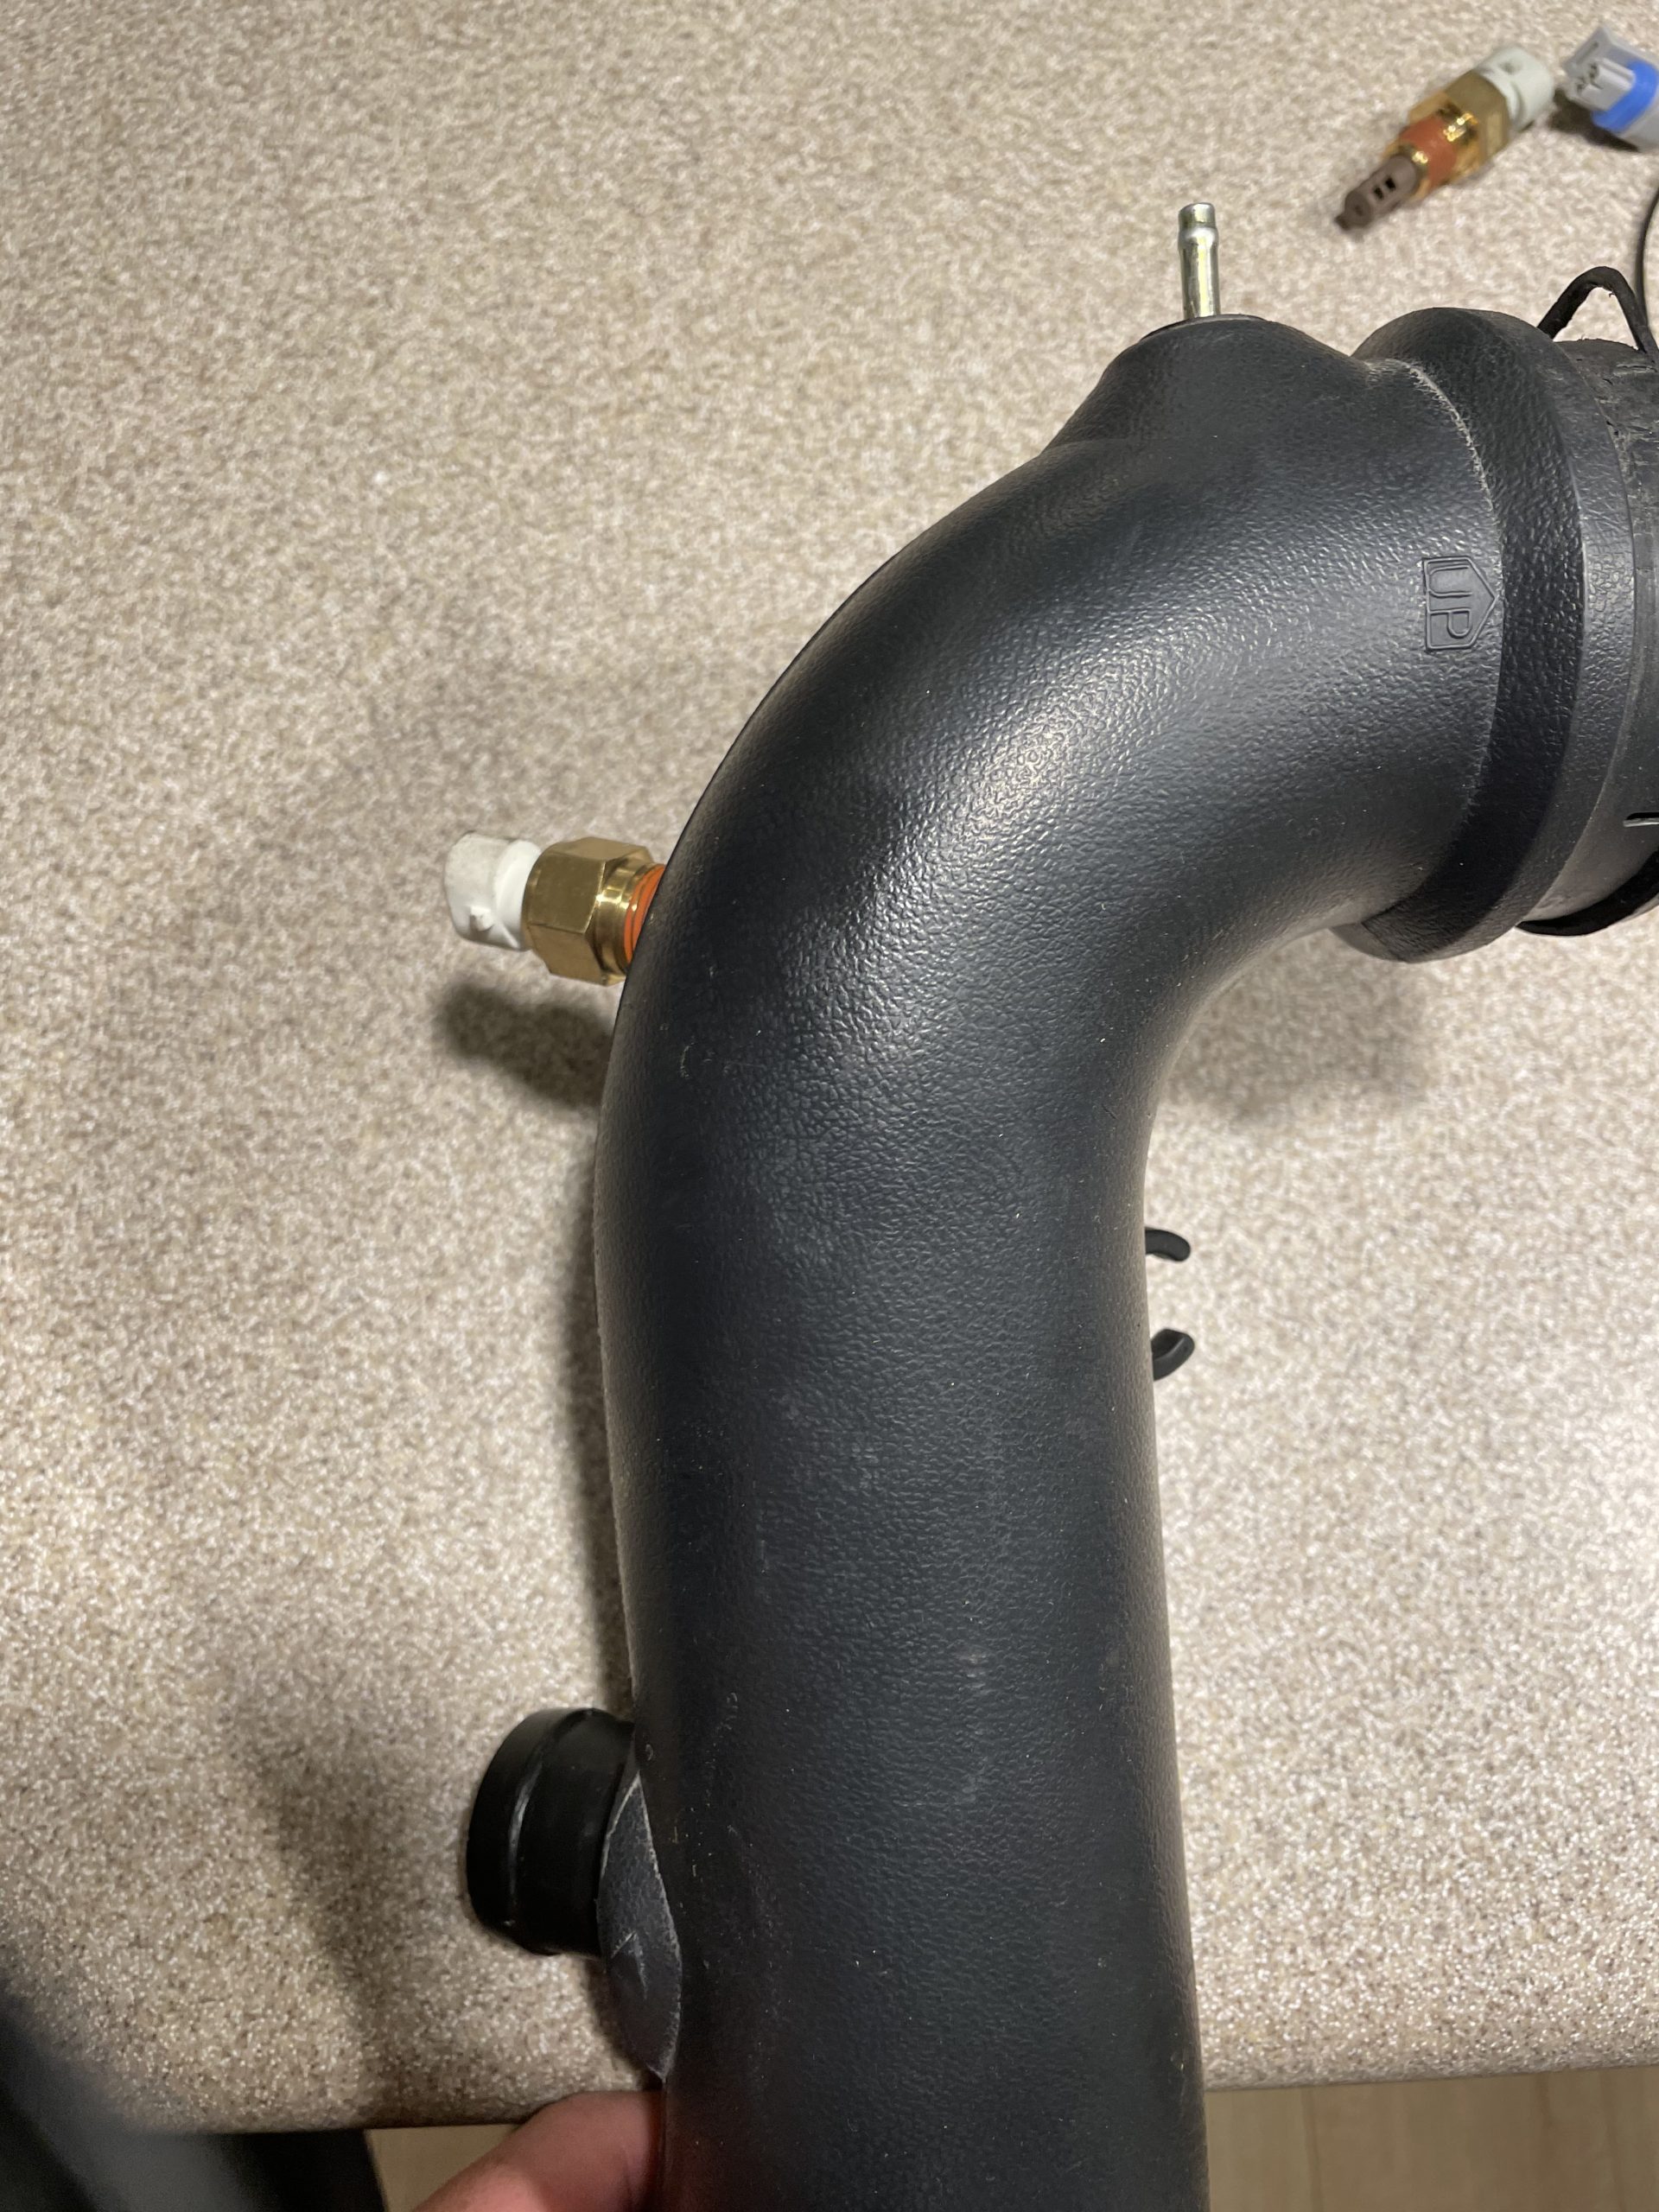
- Install the IAT sensor.
- The IAT sensor should be installed between the intercooler exit and the throttle body. Note: The thread size is M14x1.5. Above is an example of an IAT installed in the plastic Y-pipe. Note: This configuration held 21 psi without issue. Note: Ensure drilling fillings and debris is not introduced into the intake system.
- Prepare to route the PNP SDT harness.
- Disconnect and remove the battery.
- Remove the lower kick trim panel under the glove box.
- Remove the center console carpeted side panels.
- Route the PNP SDT Harness.
- The PNP SDT Harness will plug into the stock maf plug and newly installed IAT sensor.
- Route the IAT sensor wire so it does not rub or chaff on other items. Also keep wires away from the spark plugs wires.
- The main harness can be routed from the maf plug along the top of the passenger frame rail to the firewall grommet.
- In the passenger side corner of the firewall is a large rubber grommet with wire harness passing thru the firewall. This is the ideal location to pass the PNP SDT harness into the cabin. The white plug for the sdt will pass thru the grommet.
- Tip: Using a straightened section of wire similar to a clothes hanger with the white plug tapped to it using electrical tape will help pass the white plug thru the firewall grommet without damage.
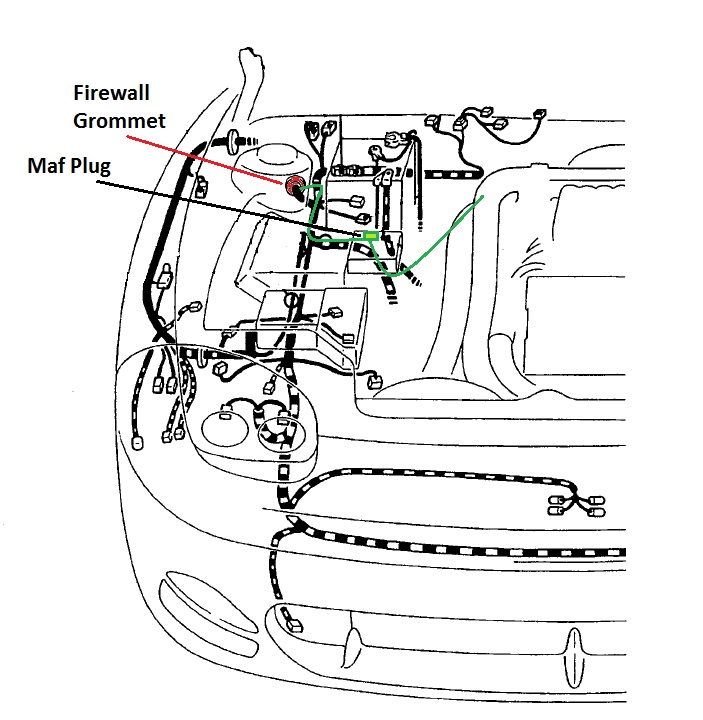
- Interior Routing Work.
- Route the harness under the dash to the area behind the ecu in the center console.
- Plug white plug into SDT.
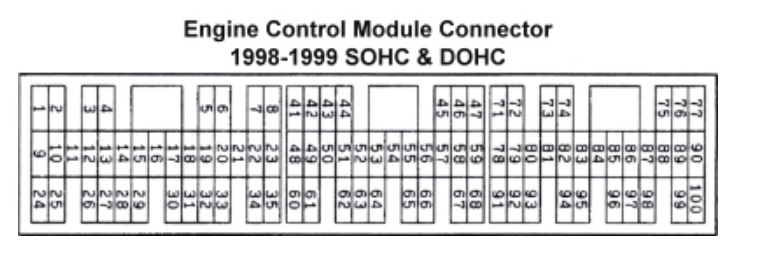
- The green wire coming from the white plug will be attached to the Tach signal going to the ecu. Note: See chart for color and location. A red connector and red T-tap is provided in the kit to tap the wire.
| Tach Pin Number | 3S Model Year | Color |
| 45 | 98-99 (VR4, SL) | White |
| 51 | 96-97 (VR4, SL) | White |
| 58 | 94-95 (VR4, SL cali) | White |
| 31 | 94-95 SL fed | White |
| 31 | 91-93 (VR4, SL) | White |
| 31 | 91-98 GTO | White |
- Route a vacuum line to SDT.
- A small vacuum line will have to be routed from the engine to the SDT.
- If a manual boost gauge has a vacuum tube already routed into the cabin a barbed tee fitting can be used to tap into this boost reference.
- The small vacuum line needs to attach at the intake manifold after the throttle body.
- There are two rubber grommets above the throttle pedal and below the brake booster. These provide access through the fire wall for the vacuum line to pass through.
- Reinstall battery.
- Ensure the PNP SDT Harness is not pinched by the battery or under strain during installation.
- Before reinstalling interior panels, test SDT installation.
- Start car.
- Ensure SDT powers on and shows iat and rpm values.
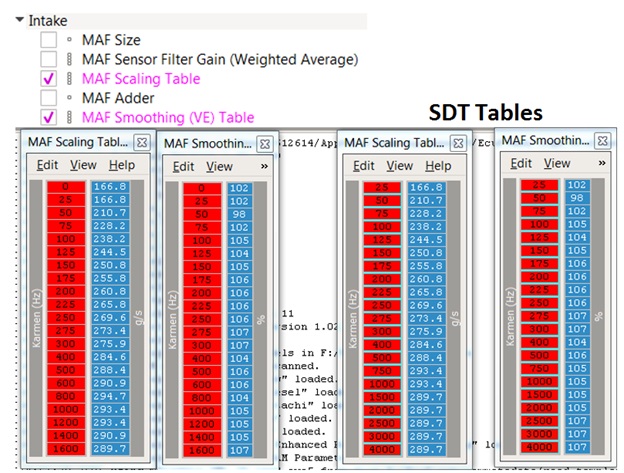
- The stock maf should be removed and replaced with a free flowing filter setup to take full advantage of the possible airflow.
- To take advantage of the increased airflow the following Intake tables should be changed as follows in Chrome .
̻��